Showing posts with label Tutorials. Show all posts

Friday, 24 October 2014

Think Pink - PTU

Think Pink

Click on tag to view fullsize


This tutorial was written by me on October 20, 2014. 
It was made of my own creation and any similarity is
purely coincidental.
I used psp x2 but any version should work
without a problem.
If you are doing this tutorial you should have a good 
knowledge of psp and be familiar with it's tools.
Lets get started!

Artist:I used the tube Hope by Elias Chatzoudis.
Please make sure you have a license to use his work.
Scrapkit: Fighter by Dance in the rain. You can purchase this
kit in the Scrap Candy store.
Wordart: BCA Wordart by Designs by Vaybs
Mask: Becky's Mask 042
Font: ParkAveD

c/p = copy and paste, ds = drop shadow

File new 650x650 flood fill with white
Open Frame 9 (F9) c/p as new layer, then resize 50%
and place to the right of your workspace.
Click inside frame with your magic want, expand by 3
then invert.
Open paper 11 (P11) copy and paste as new layer under your
frame then hit delete.
Keeping the frame selected open your close-up tube then
c/p under your frame, move to the right of the frame,
when you are happy with it's position hit delete then
goto selcetions and select none.
Duplicate your tube layer, on the original change the 
blend to luminance legacy, on the copy goto adjust, blur,
Gaussian blur at radius 3, then change the blend to screen.
add a d/s of choice to your frame.

Open frame 8 (F8) and c/p as a new layer above your other
frame and resize 45%.
Click inside frame with your magice want,expand by 3 and invert.
Open paper 16 (P16) c/p as ne wlayer under that frame and
hit delete.
Add a ds of choice to the frame.
C/p your tube as a new layer above this frame, resize and
and position to your liking then add a ds of choice.

Open element 7 (E7) c/p as new layer under your bpttom frame
layer and resize by 60%, position to the left of your tag.

Open element 20 (E20) c/p as new layer above your frames,
resize by 20%, position on the right of your bottom
frame then add a ds of choice.

Open element 37 (E37) c/p as new layer, resize 15% and place 
on the bottom corner of your lower frame under the ribbon,
add a ds of choice.

Open element 68 (E68) c/p as new layer, resize 20% and position by the bottom
right corner of your top frame, add a ds of choice.

Open element 31(E31) c/p as new layer, resize 25% and position by
the left bottom corner of your top frame, add a ds of choice.

Open element 35(E35) c/p as new layer, resize 40% and position at the
bottom of your tube layer, add a ds of choice.

Open element 54(E54) c/p as new layer, resize 40% and place over the bottom
of your bottom frame, add a ds of choice.

Open element 13(E13) c/p as new layer, resize 20% and place in the center of 
your 2 frames, add ds of choice.

Open element 58(E58) c/p as new layer, resize 15% and place to the left top
of your top frame, add ds of choice.

Open the BCA wordart by Vaybs and chose the wordart you'd like to
use, I used think pink. Resize to liking and place on your tag.

Floodfill you white background layer with pink and apply mask.

Add you copyright info and name to your tag, merge visable and
crop to size.

You're done! Please feel free to look at my tag for reference
on element placing if you are unsure.

Wednesday, 17 September 2014

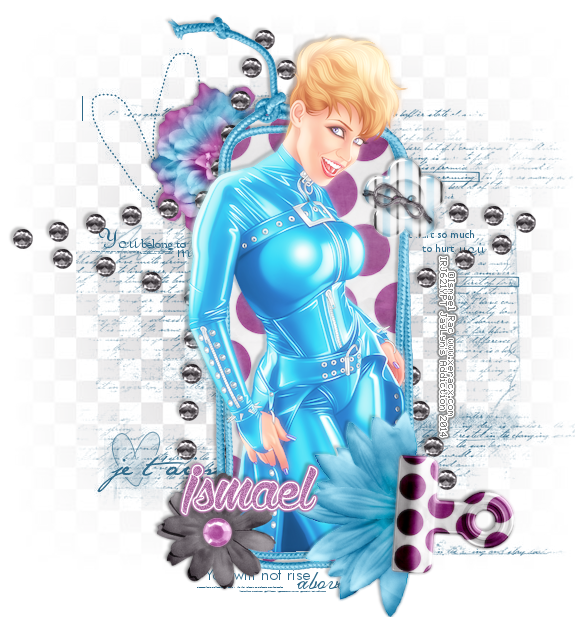
Badass

FTU - BADASS

*Click on tag to view fullsize*

This tutorial was written by me on September 17, 2014. It was made of my own creation and any similarity is purely coincidental.
I used psp x2 but any version should work without a problem.
If you are doing this tutorial you should have a good knowledge of psp and be familiar with all it's tools.
Lets get started!

Artist: She's A Badass Revamp by Ismael Rac
Scrapkit: FTU Zirconia by TK Designz
Mask: Becky's Mask 042
Font: Wolf in the City light

c/p = copy and paste, ds = drop shadow

File new 650x650, flood fill with white.
Open Blue string frame c/p as new layer, image, free rotate, left 90 degrees.
Click inside frame with your magic wand, expand by 3 and invert.
Open purple polkadots paper, shift D and close the original. Resize by 65% , c/p as new layer under the string frame and hit delete.
Open your tube (please note if you use the tube I used you must have the correct license to use his work.) c/p as new layer above the frame layer and resize to liking and delete any over hang.
Add ds of choice to both your tube and frame layers.

Open black gem star, c/p as new layer under your frame layers and move slightly to the left, add ds of choice.
Open Purple Blue flower, c/p as new layer, resize to liking and place to the left top of frame under the gem star, add ds of choice.
Open Strips Flower Button and c/p as new layer, place above your fame to the right, add ds of choice.
Open BlkFlower and c/p as new layer, place over your tube to the bottom left then add a ds of choice.
Open Blue Clipped Flower, c/p as new layer and resize to liking, place to the bottom right over your tube and add a ds of choice.

Go to your bottom layer, click layer and add new raster layer.
Choce a color from your tube and set it as your background color in your color palette. Use any word or script type brushes and add a few to this layer.
Flood fill the white bg layer with another color of choice and apply the becky mask 042.

Merge visible, crop to size and add credits and name of choice. :)


Tuesday, 9 September 2014

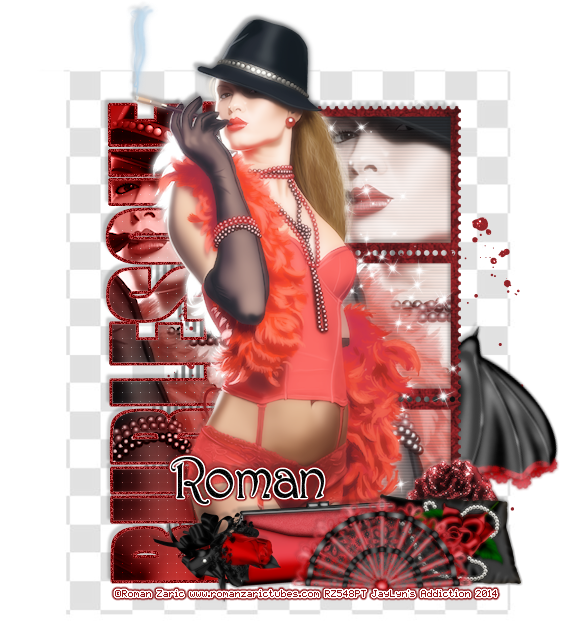
Burlesque

PTU - Burlesque

*Click on image to view fullsize*

This tutorial was written by me on September 9, 2014. It was made of my own creation and any similarity is purely coincidental.
I used psp x2 but any version should work without a problem.
If you are doing this tutorial you must have a good knowledge of psp and be familiar with all it's tools.
Lets get started!

Artist: Burlesque tube by Roman Zaric

Scrapkit: Matching Burlesque kit by Sandy's Design
Mask: EBDMask23 by Enchated by Darkness
Fonts: Impact and Parisian

c/p = copy and paste , ds = drop shadow

File - New - 650x650 - flood fill white

Open frame 1 c/p as new layer, resize by 80% and place to the left of your workspace.
Click inside frame with magic wand and expand by 3 then invert.
Open paper 2 c/p as new layer under the fame and hit delete.
Open close up tube c/p as new layer under frame and above paper and hit delete then deselect.
On the tube layer duplicate your tube, on the original change the blend mode to luminance legacy while still on your tube copy go to adjust - blur - gaussian blur - radius 3 - apply, now change the blend mode to screen.
On the same layer go to effects - texture effects - blinds - width 3 - opacity 25 -color a medium grey with both boxes checked - applyapply a ds of choice to your frame.

Now in your materials chose a bg color gradient of choice, nil foreground.

Click your text tool, I used Impact at size 30 and type out the word Burlesque or any word you want to use.
Rotate the text to your left and squash down till your text is about the same size as your frame, then convert your text to raster layer.
Now select your text layer - float - defloat - invert and c/p another close up tube over the text and hit delete and deselect. 
Change the blend mode of your tube layer to soft light.
While still on the tube layer go to effects - texture effects - weave - color and settings of choice.
Back to your text layer select all - float - defloat - expand by 3. add a new raster layer under your text and flood fill with a color of choice deselect apply dsb flux - mixed - 50% then add a ds of choice.

Open your tube and c/p as a new layer on top of frame and text, resize to liking and apply ds of choice.

Open glitter 1 c/p as new layer, move to the right of tag and move to bottom under fame layers.
Open umbrella element c/p as new layer, resize by 60% and slightly rotate to the right then place it to the right of your tag and move under your fame layers but above the glitter layer and add ds of choice.
Open sparkles ad c/p as new layer, rotate to the left then move under your tube and to the right so they are over the frame layer.
Open rose1 and c/p as new layer, resize to liking and place to the right of your tag and add ds of choice.
Open pillow with rose c/p as new layer, resize to liking and place to the bottom right of tag, add ds of choice.
Open purse1 c/p as new layer, resize to liking, play in the center bottom and add a ds of choice.
Open corsage c/p as new layer, resize to liking and rotate right, place to the left of the purse and add a ds of choice.
Open the fan c/p as new layer, resize to liking and place between the purse and pillow, add ds of choice.
Go to your bottom white layer, add new layer and flood fill with color of choice and apply mask.

Delete white background layer and merge visible, crop to size then add your credits and name of choice.